Pole Pull-Up Progressions
I absolutely love pull-ups on the pole.
Doing a pull-up (or regression of a pull-up) on the pole is one of the first strength training moves that I get students to try. I find that it’s an exercise that you can end up progressing very quickly with. Every move and spin you do will force you to start using your arm to push and pull on the pole, building your strength.

When I started pole, I had no upper body strength at all. It is only through training that I have built up the strength to be able to do pull-ups to the top of pole with just my arms – which has always been a goal of mine!
People often ask how to build up the strength for an arms only climb. So along with pole and gym training, here is how I started my pull-up progression.
Pole Pull-up Progression
Build up your pull-ups slowly – make sure that your poling is advanced enough to try the following progressions. Really focus on technique as you move through the stages. Make sure you are always engaging through your shoulders, arms, core and legs where approprate – we do not want to be hanging in our arms at any point. Stage one can be tried at any level. Always remember to work on both sides 😀
1. Basic Pull-ups
Start on your tip toes with your belly on the pole, and your arms above your head, slightly bent. Try to pull yourself up, preferably until your hands are in front of your face. Lower slowly and repeat.
Make sure that you are not jumping and really are using your arms.
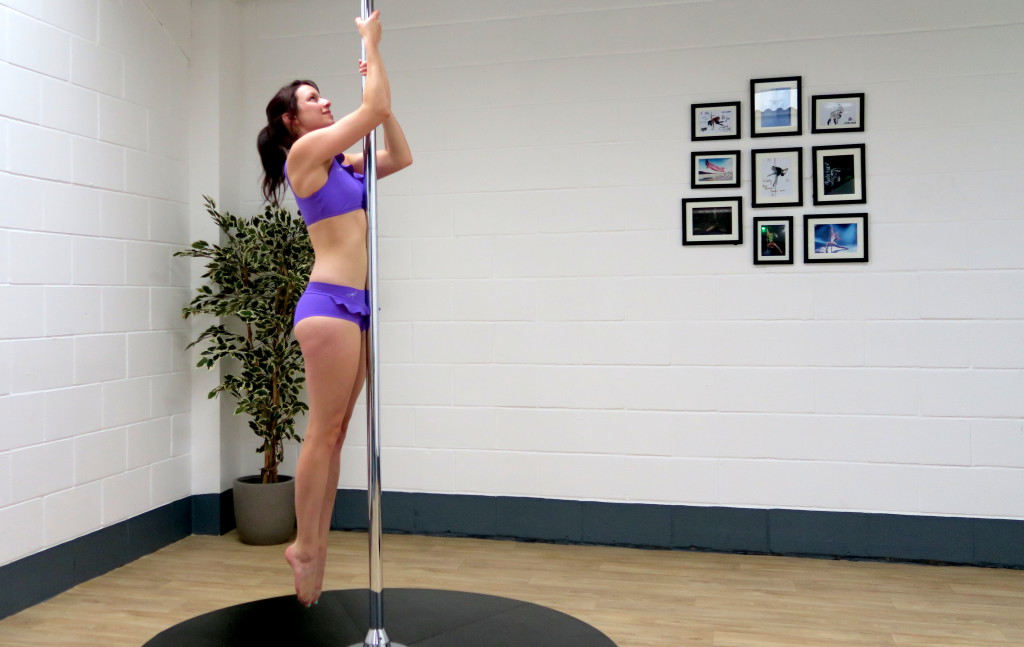
Regressions: If pole pull-ups are too much to try at the moment, start in your pull-up position with your feet flat on the floor.
Use your arms to pull yourself on to your tiptoes. Lower and repeat. Make sure you are using your arms to pull, rather than relying on your legs – if you can’t feel your arms working, there’s no point!
If the previous regression is too easy, start on your tiptoes and pull with your arms until your toes aren’t taking any weight, then release back to tip toes.
We all have to start somewhere, so don’t worry if you think you’re not getting anywhere – you certainly will with practise.
2. Seated Lowers
We train lowers to work the same muscles we need for pulling up. Therefore they are not necessarily as challenging as pull-ups but you will certain feel your arms working!
Climb the pole and go into a seat. When you first try this you can start with one climb and as you want to progress, climb higher up the pole.
Once you are in a secure seat move your hands to face height, keeping your arms bent. Start to pull on the pole with your arms. Stay seated but undo your legs slightly to release the grip between your legs and get ready to take your weight! From here, lower your body as slowly as you can until your arms are straight. You want to go to full extension without hanging in the shoulder.
Make sure you always pull through your arms, and are not hanging. When your arms are straight, grip your legs back on into your seat, move your hands to face height and repeat again.
When you are at the bottom, climb and go again! Make sure you repeat on the other side – other arm at the top and other leg on top for the seat.
The aim here is to lower yourself as slowly and as controlled as possible. I focus on keeping my arms bent and really slowly straightening them, rather than trying to move my body lower. For this move your strength will come from your arms – gravity will want to pull you down, so get ready for that!
If you find you are losing grip or lowering too quickly, you can always grab back on with your legs.
When you are ready to move on, repeat this keeping your legs out in a V shape or straddle – you may feel this in the top of your thighs.
3. Seat Pull-ups
Here’s where it gets fun! We are now trying to combine the pull-up with a seat.
Start in a low seated position. Put your arms high on the pole, keeping them slightly bent. Keep your tummy close to the pole. I always look up so that I can see where I’m going (and my head doesn’t get in the way!).
Engage your arms, shoulders and core as you start to take the weight through your arms. Release your leg grip slightly and try to pull yourself a little bit higher – even 1cm will do at this stage! Grip back on to the pole with your legs, take your hands higher and repeat. Try to get all the way to the top of the pole – even if it takes a while! From here you can climb down the pole.
Keep trying this until you can complete seated pull-ups all the way to the top of the pole through a full range of motion. When that is achievable you can combine seated pull-ups with seated lowers, making sure you always train both sides.
From there, repeat the above progressions while holding your legs out in a V shape.
4. Arms Only Lowers
So this one really does feel like a whole new level and takes a bit of trust (and grip!)
To start, go into a seat as in move number 2. Keep your hands about face height with your arms bent. When you want to lower, keep your belly as close to the pole as you can (I push my tummy to the pole so that I don’t hurt my goods 😉 ).
Start to take the tension and your weight through your arms. Make sure that you release your leg grip slowly, keeping them close to the pole incase you need to grip back on. Once you have released your leg grip you need to pull-up a few centimetres before lowing.
There is almost a weightless point when you pull-up, and this is when you want to move your arm. Think of being on a swing – at the top there is always that weightless point.
Make sure you get to this weightless point and then move your top hand underneath your bottom hand as quickly as you can. Put your legs back onto the pole to rest. Your arms should now be the other way around to when you started. Repeat by pulling up first to then lower the top arm. When you are as low as you can safely be, come back to the floor and repeat if desired.
To progress you can start higher up the pole. When you can do this from the highest point, try repeating without putting your legs on the pole between pull-ups. Make sure you are always keeping the tension through your arms.
For a further progression, try to lower without putting your legs back on the pole while keeping your legs out in a V shape.
5. Arms Only Climb
This is the big one!
So this one starts the same as the seated pull-up. From the seated position, make sure your arms are higher than your head, and your arms are bent. The higher you reach, the harder your pulls ups will be. Start to take the tension through your arms.
As you release the grip in your legs start to pull-up. You need to work with the momentum of the pull-up. When your pull-up is coming to the highest, most weightless position, that’s when you need to release the bottom hand to reach above the top hand and grab the pole. Try to aim close to the top hand without touching it.
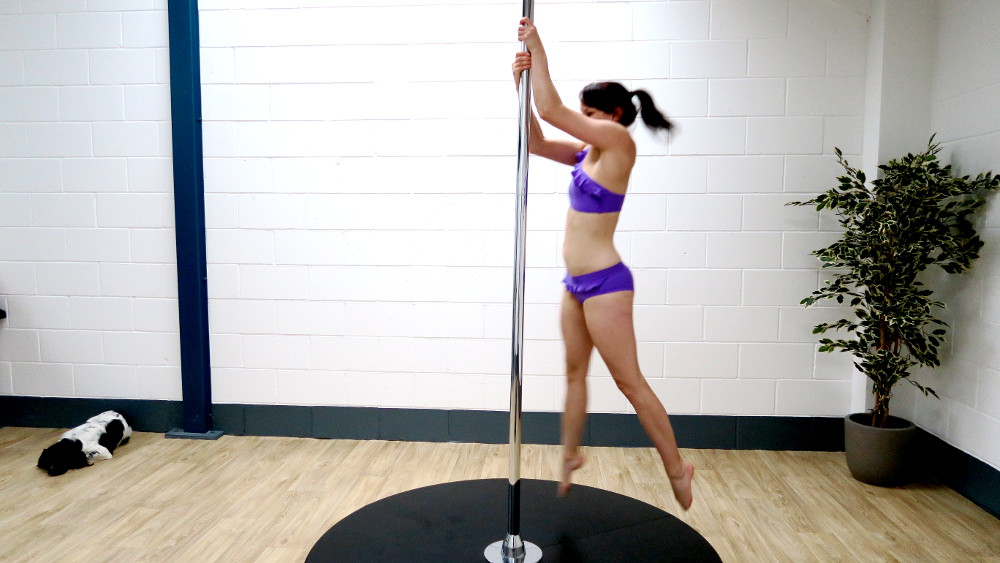
This is a quick movement and it is normal for your body to drop a little as you transition. Keep thinking about using the momentum, keep your arms bent and your tummy close to the pole. You can now grip your legs back on to the pole to rest. When you are ready, try to pull up again.
The next stage is to repeat the above movement without putting your legs on the pole between pull-ups. You can start by doing 2 without holding on and when you are ready move to 3, 4 and then to the top!
When this feels easy you can progress by straightening your legs to a V shape. You can first do this by putting your legs back on the pole between pull-ups, and then work towards arms only as above.
You can then progress this by doing your pulls up from a standing position.
If you’re on a static pole you may be able to get one or two pull-ups in before your body changes position and starts to swing around. On a spinning pole you’re able to use the momentum to help you go all the way to the top – and then back down again 😀
I’m currently on the spinning pole climb and so far can manage five pull-ups at the most – to be fair that was after an upper body gym session, so I’ll keep working on it and let you know when I can get to the top 😉
What stage are you at with your pull-ups? 😀

